Hey everyone,
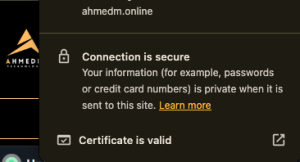
I’m thrilled to share that I’ve just completed another significant challenge: obtaining an SSL certificate for my locally hosted website, ahmedm.online! This journey involved getting a cheap domain name, configuring DNS settings, and learning a lot about web security. Here’s a detailed look at my process.
Getting a Cheap Domain Name
The first step in my journey was to get a domain name. I wanted something affordable yet reliable, so I turned to Namecheap. They offer fantastic deals, and I managed to snag my domain for just $1! Namecheap is known for its affordability and user-friendly interface, making the process of registering a domain quick and easy.
Configuring DNS with Cloudflare
Once I had my domain, the next step was to set up DNS. For this, I chose Cloudflare as my primary DNS provider. Cloudflare offers robust DNS management, enhanced security features, and performance improvements. Here’s a brief rundown of what I did:
-
- Add Domain to Cloudflare: I logged into my Cloudflare account and added my new domain, ahmedm.online.
-
- Update Namecheap DNS Settings: I then went back to Namecheap and updated the DNS settings to point to Cloudflare’s nameservers.
-
- Configure DNS Records: After the nameservers were updated, I configured the necessary DNS records in Cloudflare. This included adding an A record pointing to my server’s IP address and setting up any other required records (like CNAME or MX records).
Obtaining an SSL Certificate
With my domain and DNS settings in place, the next big challenge was to secure my website with SSL. SSL (Secure Sockets Layer) encrypts the data between the server and the users, ensuring a secure connection. Here’s how I did it:
-
- Generate a Certificate Signing Request (CSR): I generated a CSR on my local server. This CSR is needed to request an SSL certificate.
-
- Choose an SSL Provider: For the SSL certificate, I chose Let’s Encrypt. It’s free, widely trusted, and provides automated SSL certificates.
-
- Install Certbot: I installed Certbot on my server, which is a tool to automate the process of getting and renewing SSL certificates from Let’s Encrypt.
-
- Obtain the Certificate: Using Certbot, I obtained my SSL certificate by running a simple command that validated my domain and installed the certificate on my server.
-
- Configure the Web Server: Finally, I configured my web server (Apache/Nginx) to use the new SSL certificate, ensuring all traffic is served over HTTPS.
Lessons Learned
This challenge was a fantastic learning experience. Here are some key takeaways:
-
- Domain Management: Understanding how to manage domain names and DNS settings is crucial for any web project.
-
- Web Security: SSL certificates are essential for securing data and building trust with users. Learning to implement SSL certificates has made my website more secure.
-
- Cloudflare Benefits: Using Cloudflare not only for DNS but also for security and performance optimization can significantly enhance your website’s functionality.
Conclusion
Securing my locally hosted website with an SSL certificate was a rewarding challenge. From purchasing a domain name at a bargain price to configuring DNS settings and installing an SSL certificate, I’ve gained invaluable knowledge and skills. If you’re embarking on a similar journey, I hope my experience provides some useful insights.
Feel free to visit ahmedm.online and let me know what you think!
Cheers, Ahmed


